

Bromic Heater Installation Height Guide: How to Plan the Right Mounting Position
There isn’t one correct height for every Bromic heater. A useful Bromic heater installation height guide starts with the specific model and mounting position, not a universal measurement. A wall-mounted electric heater, for example, has different planning considerations from a ceiling-mounted or suspended unit. The position affects both comfort and how the heater fits into your patio design.
It’s reasonable to want a clear number before coordinating a heater with your ceiling, walls, seating, and other fixtures. But the correct position depends on the model, mounting configuration, required clearances, and layout. The installation manual for the exact heater is the essential reference for its requirements.
This guide explains what to assess before choosing a position, how mounting height relates to comfort and coverage, and how Bromic heater categories can suit different outdoor spaces. Use these considerations to plan a location that works with the product requirements and the architecture around it.
Key Takeaways
- Use the Bromic heater installation height guide to plan around the exact heater model and configuration, not a general recommendation.
- Match the installation documentation to the model and mounting method, then record the specified dimensions and reference points.
- Compare ceiling, wall, flush, and freestanding placements with your patio layout and available mounting surfaces.
- Map seating, boundaries, and nearby fixtures before finalizing a position. Keep your site measurements separate from the heater’s specified clearances.
- Consider intended use, mounting options, and site conditions together when choosing a Bromic heater.
Why Bromic Heater Installation Height Depends on More Than One Number
There is no single suitable installation height for every Bromic heater. The right position depends on the exact model, mounting method, patio geometry, and manufacturer’s instructions. Treat general height recommendations as a planning reference only, not a substitute for the requirements in the current installation documentation for your heater.
For planning purposes, installation height means the distance and position specified for a particular heater and mounting configuration. The manual may measure from a particular part of the heater to the floor, ceiling, or another reference surface. Follow the reference points shown in the manual rather than assuming a measurement from one arrangement applies to another.
Why a universal Bromic heater height can mislead
Bromic heaters come in different designs and mounting configurations. Wall-mounted, ceiling-mounted, flush, and freestanding placements each raise different questions about position and available space. The correct height depends on the exact model and mounting arrangement.
For example, a wall position needs to be considered in relation to the mounting surface and the space below it. A ceiling or flush arrangement also depends on the overhead structure, while freestanding placement has different reference points. Explore the Bromic patio heater selection while considering which mounting approach fits your patio.
What the installation height is, and is not
Height is only one part of the placement plan. A heater’s installation height is distinct from its required clearance to the ceiling, walls, or nearby objects. Infrared heating uses radiant energy. Reading about an infrared heater can provide general context, but it does not establish the correct position for a particular Bromic model.
Before selecting a location, note the surfaces and features that define the space:
- The intended mounting surface and its position relative to the floor.
- The ceiling or overhead structure, including any changes in height.
- Nearby walls, furniture, curtains, and other objects that could affect placement.
- The seating area you want the heater to serve and the routes people use through the patio.
These are site measurements, not product specifications. Record them separately from the dimensions and clearances in the manual, then compare both sets of information with the exact heater model and mounting configuration. A broad recommendation cannot account for every ceiling, wall, recess, or seating layout.
Use the current installation documentation as the reference for required dimensions and clearance directions. Match it to the model itself, not just the collection name, and confirm that it covers the intended mounting arrangement. This keeps layout decisions tied to the correct specifications while helping the heater fit naturally into the finished patio.
How to Find the Correct Height in Your Bromic Model's Installation Guide
A reliable Bromic heater installation height guide starts with the unit you plan to use, not a measurement copied from another heater. Follow these steps to connect the model, mounting choice, and patio conditions to the right installation information.
- Identify the exact heater. Record the full model identification shown on the product information or packaging. A collection name alone may cover more than one model, so it may not identify the instructions for your unit.
- Choose the intended mounting method. Note whether the plan is ceiling-mounted, wall-mounted, flush-mounted, or freestanding. Include any mounting hardware or accessories you’re considering in your configuration notes.
- Locate the matching documentation. Find the current installation guide for the exact model and intended mounting arrangement. Use documentation that covers the configuration, not a guide for a similar-looking heater.
- Record the specified dimensions. Review the diagrams and note the stated height, the points between which it is measured, and each clearance requirement. Keep height and clearances in separate fields.
- Assess the patio. Measure the intended mounting surface, ceiling, nearby boundaries, and seating locations. Compare these site dimensions with the product requirements before settling on a position.
Read the diagram, not just the headline number
Installation diagrams show where measurements begin and end. Check whether each measurement refers to a surface, an edge, or a specific part of the heater. Record the units as shown, and avoid converting or rounding a value in a way that obscures the source measurement. If your plan includes a mounting accessory, check that the documentation covers it and that it’s compatible with the exact model.
Use the chosen model’s installation guide for its required dimensions. This keeps your planning tied to the configuration under consideration rather than to a general recommendation that may use different reference points.
| Planning detail | Record for your project |
|---|---|
| Model | Full model identification |
| Mounting method | Ceiling, wall, flush, or freestanding |
| Required height | Value and reference points from the guide |
| Clearances | Each specified direction and measurement |
| Source document | Guide title or file, revision, and date if shown |
Keep this record with your patio measurements so product and layout discussions stay specific. For broader information about heat exposure and hazards, consult OSHA Heat-Related Hazards. This information does not replace Bromic’s model-specific installation instructions.
If you’re comparing mounting options with your patio dimensions, a complimentary heater planning consultation can help you consider product fit and configuration.
Ceiling, Wall, Flush, or Freestanding: Compare Bromic Heater Placement
Mounting style affects more than appearance. It determines which surfaces and sightlines to assess, where the heater can sit in relation to seating, and which installation instructions apply. Consider the mounting approach alongside the heater and the character of the patio, rather than treating it as a finishing detail.
The table below is a planning aid, not a specification sheet. Exact permitted configurations and required dimensions depend on the heater and its current documentation.
| Mounting approach | Possible layout fit | Measurements to consider | Documentation to check |
|---|---|---|---|
| Ceiling-mounted | May suit a patio with an overhead structure and a clear overhead position. | Ceiling position, intended heater location, seating below, and nearby fixtures. | The exact model’s ceiling-mount instructions and applicable clearances. |
| Flush-mounted | May suit a design where a low-profile, integrated appearance is a priority. | Proposed location within the ceiling, surrounding features, and the relationship to seating. | Instructions for the exact model and flush-mount configuration, including any relevant accessory documentation. |
| Wall-mounted | May suit a layout with a suitable wall position. | Available wall area, nearby boundaries, seating, and sightlines from inside and outside. | The model’s wall-mount instructions and specified clearances. |
| Freestanding | May suit a layout where fixed mounting isn’t the chosen approach. | Proposed position, seating arrangement, circulation, and nearby objects. | The exact heater’s approved configuration and instructions for its intended use. |
When ceiling or flush mounting suits the patio layout
An overhead position can preserve open wall areas and align the heater visually with the structure above. A flush installation may appeal when a discreet profile matters, but it also brings model- and accessory-specific requirements into the plan. Don’t assume a recess or ceiling arrangement is suitable based on appearance alone. Follow the documentation for the exact configuration.
When wall or freestanding placement merits consideration
Wall mounting makes the available wall area a key consideration. Check whether the proposed position relates sensibly to the seating zone without interrupting doors, views, or other fixtures. A freestanding option may suit a plan that doesn’t rely on fixed mounting, but the layout still needs to account for movement through the space and the heater’s approved setup.
Consider what people will see from the seating area and adjoining rooms. A heater can become part of the patio’s visual composition, so note whether it aligns with beams or other architectural features or draws attention away from a view. These considerations can help narrow placement options. The model’s instructions determine which configurations and dimensions are appropriate.
Use this Bromic heater installation height guide to compare layout options, then verify the selected model and mounting configuration against its documentation before finalizing your plan.
Plan the Patio: Measurements and Clearances to Check Before Installation
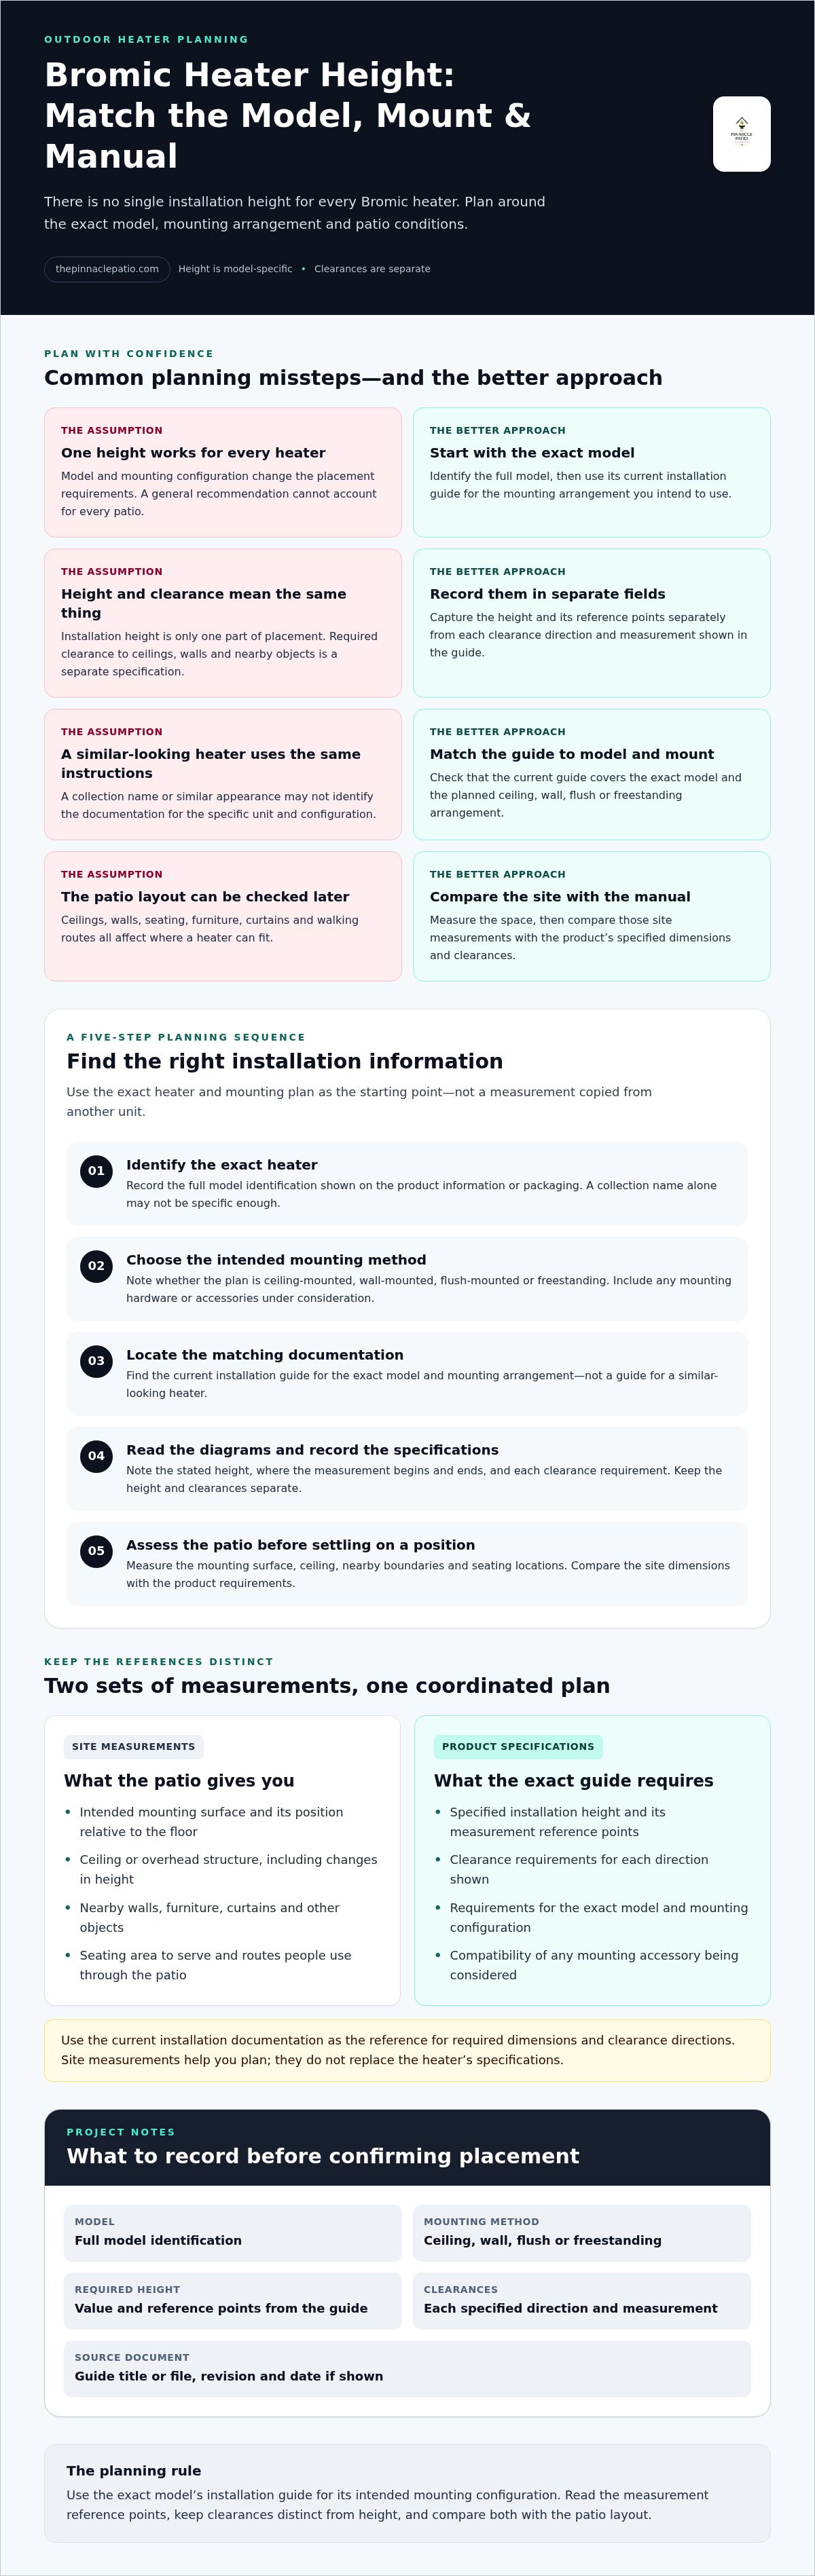
A useful patio plan keeps two records side by side: physical measurements of the space and product specifications from the selected heater’s current installation guide. This helps you assess whether a proposed position fits the space instead of relying on a remembered measurement or a general recommendation. Read the Bromic heater installation height guide for your chosen model alongside your site notes, not in place of them.
Measure the space and map the intended warmth zone
Sketch the patio from above. If the ceiling or roofline varies, add a simple side view. Mark the proposed heater position, mounting surface, seating, overhead structures, walls, doors, and nearby fixtures. This can reveal conflicts early, such as a fixture near the preferred position or seating outside the intended zone. Check the model’s documented coverage separately, because coverage and mounting height are different considerations.
- Mounting surface: Record the type and location of the proposed ceiling or wall surface, or the planned freestanding position.
- Overhead structure: Note the ceiling height and any changes in the structure near the proposed heater location.
- Nearby boundaries: Measure distances to adjacent walls and fixed objects, recording each direction separately.
- Seating and circulation: Mark where people sit, gather, and move through the patio.
- Fixtures and accessories: Locate lights, fans, beams, and any mounting accessory you’re considering.
These notes describe your patio; they are not required heater dimensions. Those come from the model-specific documentation. Reviewing the available Bromic patio heaters while mapping how you intend to use the space can help connect product selection with the overall layout.
Check clearances and site conditions against the manual
After measuring the space, compare it with the installation guide for the exact model and mounting configuration. Installation clearances are model-specific and must be checked in the relevant guide. Keep each clearance distinct from mounting height, and record the measurement’s reference points as shown in the documentation.
- Ceiling: Check the required clearance above or around the heater for the chosen mount.
- Walls: Review side and rear clearances where specified.
- Nearby objects: Check requirements for furniture, curtains, fixtures, and other items in the surrounding space.
- Materials and ventilation: Follow any instructions for nearby materials or ventilation for that exact model.
- Fuel and utilities: For models with fuel or utility requirements, follow the relevant instructions rather than assuming one configuration applies to another.
If your site measurements don’t align with the product requirements, revise the proposed location before work begins. Have a qualified installation professional assess site-specific details and follow the model’s instructions.
Choose a Bromic Heater with Height Planning in Mind
Consider the heater and its mounting position together. Start with how you use the patio, then weigh the layout, available mounting surfaces, and the exact installation requirements for each model. A heater that suits your visual plan still needs a mounting configuration that works with the site and the manufacturer’s instructions.
Match the Bromic heater category to the space
Bromic offers electric and gas heater categories, but category alone doesn’t determine whether a unit suits a particular patio. Consider how you use the space, where people gather, which mounting surfaces are available, and how a heater would fit the architecture. As you compare the Bromic patio heater options, review the documentation for each model rather than assuming a collection description covers every configuration.
For a covered entertaining area, an overhead structure may make ceiling or flush placement part of the design discussion. A patio with a usable wall position may call for a different comparison. If you prefer not to plan around a fixed mounting point, consider whether a freestanding configuration is appropriate for the model. These are layout considerations, not universal recommendations. Suitability depends on the product’s documented requirements and the conditions at the site.
Consider fuel type alongside mounting choice and site conditions. The relevant installation instructions establish which configurations apply to a given heater and what the installation requires. Avoid choosing on appearance or category alone, particularly when your preferred position has nearby boundaries, fixtures, or a distinctive ceiling arrangement.
Move from planning measurements to a confident decision
Before narrowing your options, bring the essential project details together. A concise planning file connects how you want to use the space with the product information needed to assess fit.
- Model preference: Note the full identification of any heater you’re considering, not just its collection name.
- Patio sketch: Mark seating, overhead structures, walls, fixtures, and the proposed heater position.
- Mounting surface: Record where the unit could be mounted or where a freestanding option could be placed.
- Manual dimensions: Include model-specific mounting measurements and clearances, separate from your site measurements.
- Configuration questions: Flag any accessory, fuel, compatibility, or design considerations that affect the proposed setup.
With these details, you can compare options against your actual patio instead of relying on a generic height recommendation. The Bromic heater installation height guide for your chosen model remains the reference for its required dimensions. A consultation can help connect those requirements with product selection, configuration, and the broader outdoor design.
Shape a Heater Plan Around the Way You’ll Use Your Patio
Turn your preferred heater position into a considered part of the outdoor design. Use the Bromic heater installation height guide to keep the model’s documented requirements in view as you plan how the space will work for a quiet evening or a gathering with friends.
The Pinnacle Patio offers Bromic luxury heaters and complimentary consultations for product and configuration guidance. Bring your patio plan and the heater options you’re considering to a conversation focused on finding a thoughtful fit for your space.
A well-considered heater choice can make your patio more welcoming while preserving the design you have in mind.
Frequently Asked Questions
What is the correct installation height for a Bromic heater?
There isn’t one correct height for every Bromic heater. It depends on the exact model and mounting setup. For example, Bromic’s general electric guidance distinguishes wall mounting, with a minimum floor clearance of 1,800 mm, from ceiling mounting, with a minimum of 2,400 mm. These figures aren’t universal instructions for every heater. Use the current guide for your model and configuration as the authority. That’s the practical starting point for any Bromic heater installation height guide.
Can Bromic heaters be mounted on a wall or ceiling?
Yes, Bromic heaters include wall- and ceiling-mount options, but the approved method depends on the specific heater. Before planning around a wall or overhead structure, check the model’s documentation for the mounting arrangement and compatible hardware. Consider how the proposed position relates to doors, windows, lights, fans, and seating. A position that fits the architecture still needs to meet the heater’s requirements.
How do I find the minimum clearance for my Bromic heater?
Find the current installation manual for the full model number, then review its clearance diagrams and tables. Check each direction separately, including distance to the ceiling, walls, floor, and nearby objects, and note the reference points shown. Don’t use a clearance listed for a different model or mounting setup. If you’re comparing configurations, keep the dimensions from each manual in a separate record to avoid mixing requirements.
Does the right installation height depend on whether the Bromic heater is electric or gas?
Yes. Electric and gas models can have different installation requirements, and mounting method matters too. For example, Bromic’s guidance for Platinum Smart-Heat gas specifies a 96-inch minimum floor clearance, while electric guidance varies by wall or ceiling mounting. These examples don’t replace the exact product manual. Confirm the model, fuel type, mounting arrangement, and any selected accessory together before deciding whether a location will work.
Can I install a Bromic heater under a covered patio?
Some Bromic heaters can be planned for covered patio settings, but whether a specific location is suitable depends on the model and the surrounding structure. Check the manual’s requirements for overhead and side clearances, nearby materials, and any ventilation or fuel-related conditions stated for that unit. A roof or ceiling doesn’t automatically make a position appropriate. Have a qualified installation professional assess the site against the heater’s instructions.
What should I measure before choosing a Bromic heater?
Measure the height and position of possible mounting surfaces, the patio’s boundaries, and the locations of seating and fixed fixtures. Note doors, beams, ceiling changes, fans, and lights that could affect placement. Separately record the dimensions and clearance requirements in the installation documentation for each model under consideration. For example, a low ceiling may narrow mounting choices, while a wall with limited uninterrupted space may lead you to compare another configuration.
Can a Bromic heater be flush-mounted?
Flush mounting is available for some Bromic heater configurations, but it isn’t suitable for every model or ceiling. Check the exact heater’s current documentation and any instructions for the flush-mount accessory being considered. Confirm that both documents apply to the intended setup, then compare their requirements with the patio ceiling and surrounding features. Don’t assume that a recessed appearance alone means the installation meets the specified conditions.