

How to Cook a Whole Chicken on a Rotisserie: A Step-by-Step Guide
A golden rotisserie chicken starts before the grill is lit. If the bird isn’t secured and balanced on the spit, it may wobble as it turns, browning unevenly or cooking inconsistently. Learning how to cook a whole chicken on a rotisserie means getting those fundamentals right, then managing the heat and checking doneness with a thermometer.
How long will the chicken take? Which burners should you use? And how do you brown the skin without drying out the meat? The answers depend on your grill, the bird’s size, and the recipe. Start with controlled indirect heat, keep the bird turning steadily, and use temperature readings rather than appearance or time alone to judge when it is done.
This guide covers each stage, from seasoning and trussing to mounting, balancing, cooking, and resting. It also explains which grill and rotisserie details to compare before choosing equipment, so you can plan a setup that suits the way you cook.
Key Takeaways
- Learn how to cook a whole chicken on a rotisserie by following a clear sequence from seasoning and trussing through cooking and resting.
- Secure loose parts and check the bird’s balance on the spit before switching on the motor.
- Use indirect heat as your starting point, then follow the grill manufacturer’s instructions for your specific setup.
- Treat recipe cooking times as estimates, and use a food thermometer and current USDA guidance to assess doneness.
- Before choosing a grill or rotisserie attachment, compare compatibility, capacity, clearances, and operating instructions.
Why rotisserie chicken cooks differently, and how to start well
A rotisserie turns food continuously over controlled heat. As the chicken rotates, different parts of its surface face the heat, encouraging more even browning than cooking it in one fixed position. Rotation does not guarantee that the meat will baste itself or stay moist, so preparation, heat control, and a reliable doneness check still matter.
Rotisserie cooking uses slow, continuous rotation over controlled heat to help a whole chicken brown more evenly. For a general overview of the rotisserie chicken cooking method, including how rotating meat cooks near a heat source, see Wikipedia.
Compared with oven roasting, a grill rotisserie adds a turning spit and requires you to check how the bird sits within the grill. Oven roasting keeps the chicken stationary in a controlled cooking environment. Neither method is universally better. A rotisserie suits grill-cooked poultry, while an oven may be more practical for a kitchen-based meal or a recipe developed for that method.
To learn how to cook a whole chicken on a rotisserie successfully, first choose a bird that fits your equipment. Then prepare it with the spit and available cooking space in mind. These early checks help prevent balance and clearance problems once the grill is hot.
Choose a suitable whole chicken
Use a fully thawed chicken that fits the grill and spit safely. The bird’s size affects how its weight sits on the spit, how much room it needs to turn, and how long it takes to cook. There is no single weight that suits every grill or recipe. Check the grill and rotisserie instructions for fit, then choose tested recipe guidance for a bird of a similar size.
Prepare the chicken for even cooking
Remove the packaging and giblets, following the product directions and current food-safety guidance. Pat the skin dry before seasoning; a dry surface supports browning. Dry-brining is optional. It generally involves salting the chicken ahead of cooking and allowing time for the seasoning to work. If you use this approach, follow a tested recipe’s timing and handling directions.
Include the cooking setup in your planning. A bird that appears to fit while the grill is cold still needs room to turn without touching the cooking surface, lid, or other grill parts. Check the equipment instructions rather than relying on appearance alone. If you’re comparing built-in grill options, review each grill’s specifications and rotisserie guidance to assess fit and intended operation. Compatibility varies by model.
Start with a thawed bird suited to the equipment, dry and season the skin, and treat dry-brining as an option rather than a requirement. Next, secure the chicken so it stays in position as the spit turns.
Season and truss the chicken so it turns securely
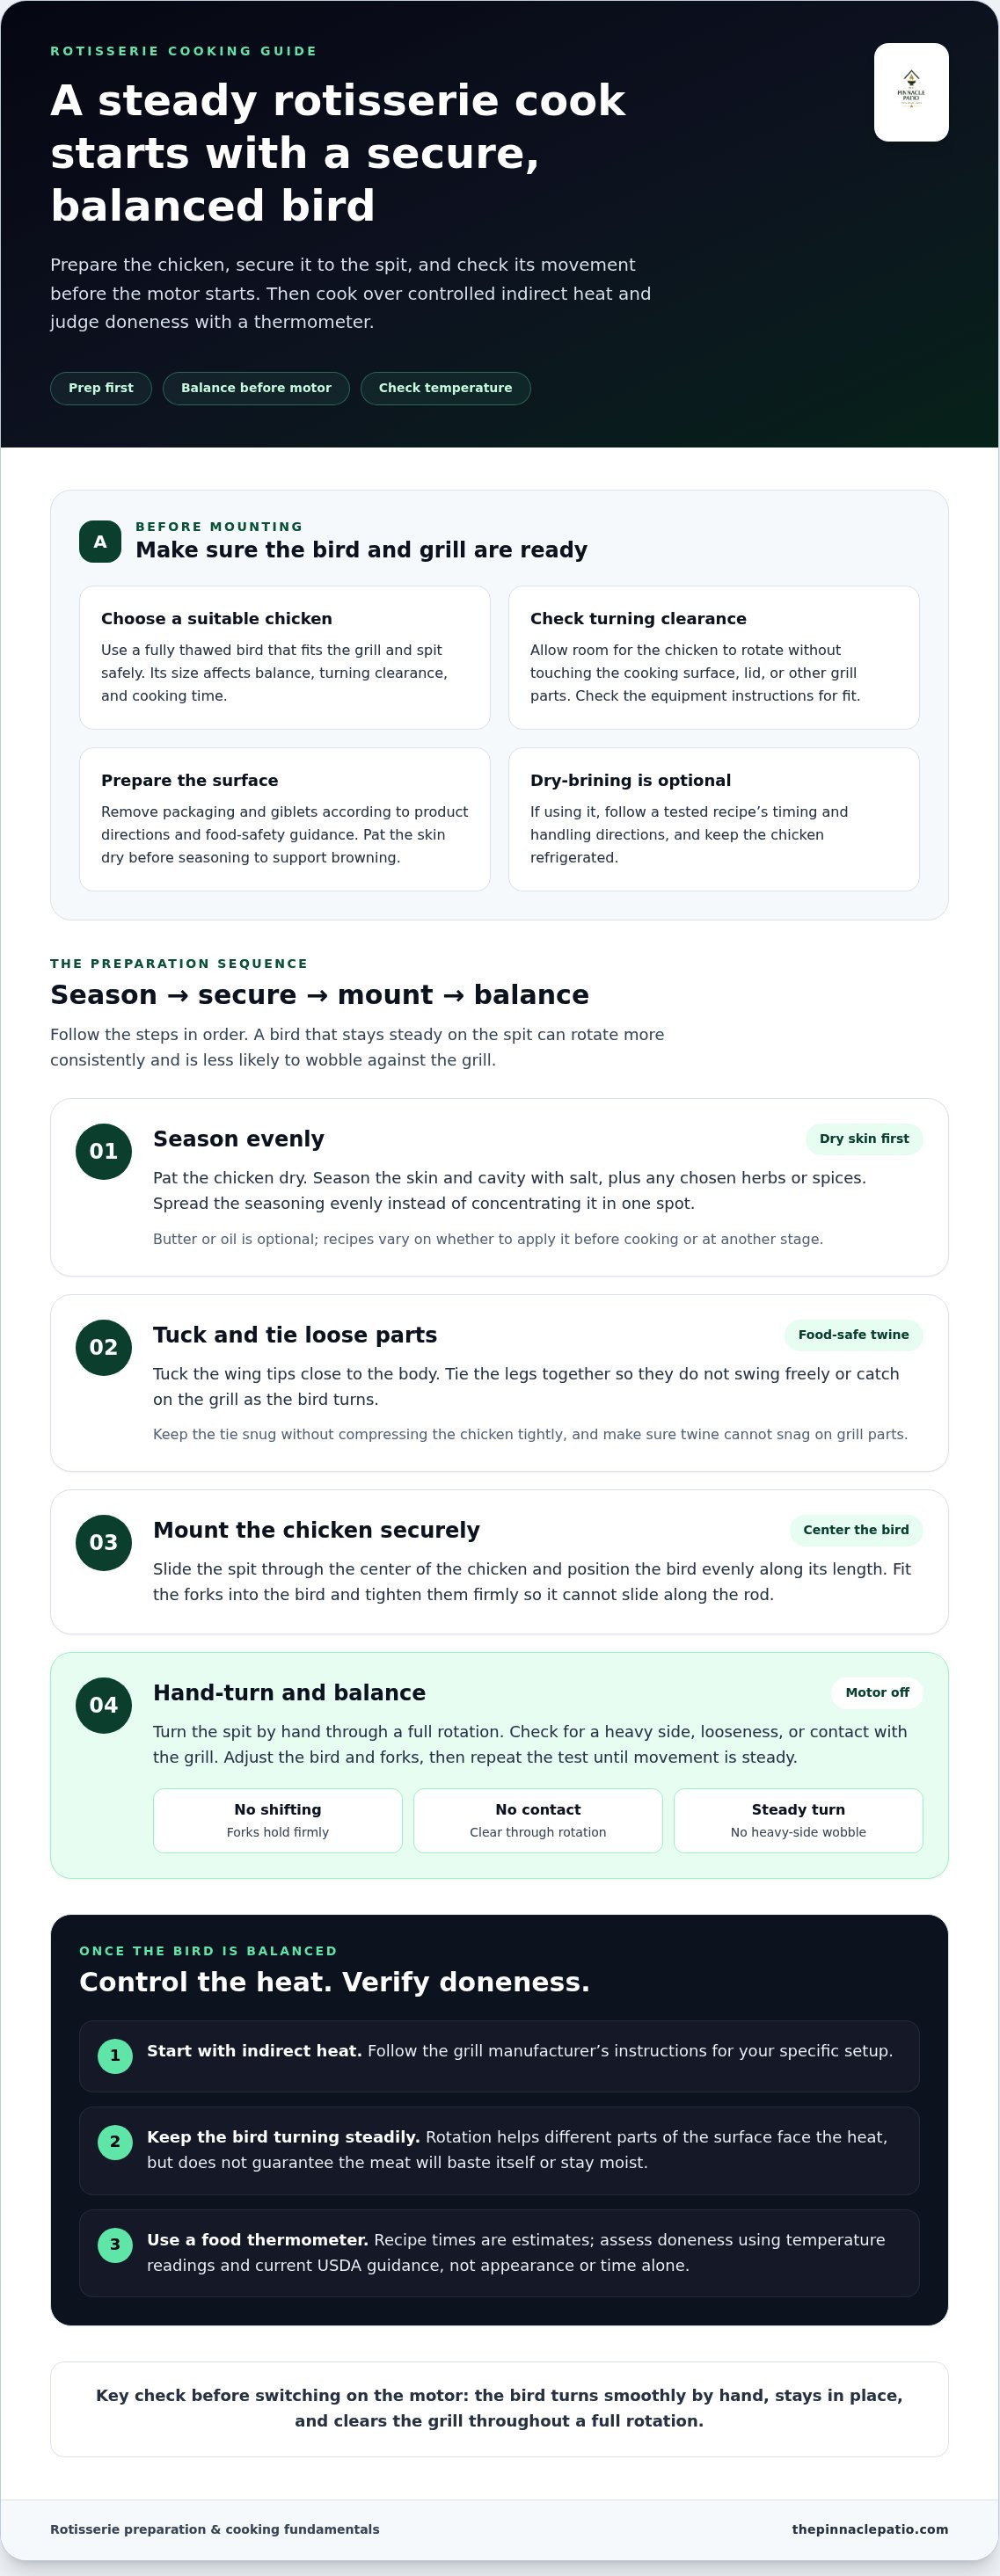
A well-seasoned bird can only cook evenly if it stays steady on the spit. Follow this sequence: season the chicken, secure loose parts, mount it on the spit, then test its balance by hand before turning on the motor. These steps help keep wings and legs from loosening and reduce wobbling as the bird rotates.
A balanced, securely tied chicken rotates more steadily, helping heat reach the bird more consistently. Check the fit before cooking. If the bird shifts, the spit may turn unevenly, affecting browning and placing extra strain on the rotisserie motor.
Season for flavor and well-browned skin
Start with salt, then add herbs or spices to suit the meal. A specific blend is not required. Dry-brining is optional and works best when your schedule allows for the timing in a tested recipe. Keep the chicken refrigerated during the process and follow safe-handling guidance. Butter or oil is optional as well; recipes differ on whether to apply it before cooking or at another stage.
For a straightforward preparation, work through these steps in order:
- Pat the chicken dry, then season the skin and cavity with salt and any chosen herbs or spices. Distribute the seasoning evenly rather than concentrating it in one spot.
- Tuck the wing tips close to the body. Tie the legs together with food-safe kitchen twine so they don’t swing freely or catch against the grill as the bird turns.
- Slide the spit through the center of the chicken, positioning the bird evenly along its length. Fit the forks into the bird and tighten them firmly so the chicken cannot slide along the rod.
- With the motor off, turn the spit by hand through a full rotation. Check for a heavy side, looseness, or contact with the grill. Adjust the bird and forks, then repeat the test before switching on the motor.
Truss, mount, and balance the bird
Trussing means tying the legs and securing loose parts close to the body, not compressing the chicken tightly. A snug tie helps the bird hold its shape on the spit, while firm forks keep it from slipping. During the hand-turn test, the bird should travel smoothly without shifting or striking the grill. Follow the rotisserie maker’s instructions for securing the spit and operating the motor.
Don’t skip the hand-turn test, even if the chicken looks centered while stationary. An uneven load may become more noticeable once the spit rotates. Make small adjustments until the movement is steady. Keep the twine clear of grill parts where it could snag, and remove packaging or other loose material before mounting the chicken.
If you’re choosing an outdoor cooking setup and want guidance on grill sizing or configuration for rotisserie use, you can schedule a consultation about grill compatibility.
Set up grill heat for steady rotisserie cooking
Once the chicken is mounted, prepare the grill for indirect heat. Where the grill design allows, keep the main heat source from sitting directly beneath the bird. This limits intense direct exposure as the chicken rotates and allows it to cook steadily. The correct burner arrangement depends on the grill, so follow its instructions along with the guidance for your rotisserie attachment.
Direct heat comes from a source directly beneath the food; indirect heat cooks it with the source positioned away from the food. This distinction matters for rotisserie cooking because dripping fat can meet an open flame and cause flare-ups.
Arrange heat and a drip pan
Place a heat-safe drip pan beneath the chicken to catch fat and juices. Position it so it does not touch the bird or interfere with the spit’s rotation. Follow your grill and rotisserie manufacturers’ instructions for pan placement and burner use. A pan helps manage drippings, but it does not replace the need to set up the grill for indirect cooking.
Before lighting the grill, check the chicken’s path again. It should turn freely without striking the pan, cooking grates, or other grill parts. A pan that blocks rotation or sits too close to a heat source may interfere with the cook, so position it according to the equipment guidance.
Manage gas and charcoal setups
On a gas grill, an indirect zone typically means using burners away from the chicken and leaving the burner directly beneath it off, where the grill’s design permits. For a charcoal setup, place coals to the sides, leaving none directly beneath the bird. These are general principles, not interchangeable controls. Follow the instructions for your specific grill and rotisserie attachment.
Use a tested recipe for the target grill temperature and cooking approach. One temperature range does not suit every grill, fuel type, chicken size, or recipe. Preheat and adjust the heat as directed, then monitor the grill’s temperature instead of relying only on the burner dial or flame intensity.
If you see flare-ups, the drip pan may be catching drippings, but grease or food debris elsewhere in the grill can still cause flames. Follow the manufacturer’s safety and operating instructions to manage them. Don’t move the chicken or change burner settings in a way that conflicts with those directions. If the grill temperature drifts, make measured adjustments and allow time for it to respond.
Learning how to cook a whole chicken on a rotisserie includes matching the heat plan to your equipment, not just choosing gas or charcoal. When comparing built-in grills, review each model’s specifications and operating guidance to assess how a rotisserie setup may fit your cooking needs.
Cook, check doneness, rest, and troubleshoot
Once the grill is steady and the chicken turns freely, cook it according to a tested recipe for your bird and setup. Treat the recipe’s cooking time as an estimate, not proof that the chicken is done. Grill design, bird size, and how cold the chicken was when it went on all affect cooking time. If you’re learning how to cook a whole chicken on a rotisserie, use a thermometer to make the final decision.
Use temperature, not time alone, to judge doneness
The USDA Food Safety and Inspection Service recommends cooking all poultry to a safe minimum internal temperature of 165°F (74°C). Check the thickest part of the breast and the innermost parts of the thigh and wing with an instant-read thermometer. Avoid bone, which can distort the reading. Check more than one spot; color alone does not confirm safety.
- Use the recipe’s timing to estimate when to begin checking, not as a guaranteed finish time.
- Carefully stop the rotisserie as directed by the equipment manual before checking the chicken.
- Insert the thermometer into the thickest areas without touching bone, then compare each reading with current USDA guidance.
- If a reading is below the safe minimum, continue cooking and check again before removing the bird.
Rest the chicken and correct common problems
After the chicken reaches the safe temperature, remove it according to the equipment instructions and rest it before carving. Follow a tested recipe for the resting duration. If the skin browns faster than the interior cooks, adjust the heat using the grill’s controls and instructions. Avoid reaching over flames or handling a hot spit. If rotation stalls, switch off the equipment and follow its manual before investigating.
Use the symptoms below to identify a sensible next step. Make adjustments only when the grill and rotisserie instructions allow them.
| What you notice | What to do |
|---|---|
| Uneven browning | Check that the bird remains secure and balanced, then review heat placement and adjust according to the grill instructions. |
| Flare-ups | Use the grill’s approved controls to reduce or manage heat. Don’t move a hot drip pan or reach into the grill while it’s operating. |
| Bird stops rotating | Switch off the grill and rotisserie, then follow the equipment manual. Don’t try to free or reposition the bird while the motor is running. |
Let the thermometer guide the finish, then rest the chicken before carving. For help matching a grill setup to your cooking plans, schedule a consultation.
Choose a rotisserie-ready grill setup for future cooks
A successful rotisserie cook depends on more than the chicken and recipe. The grill, spit, motor, and available cooking space need to work together. Compatibility and capacity vary by model, so don’t assume that every built-in grill accepts a rotisserie attachment. Before choosing a setup, compare the manufacturer’s specifications for fit, operation, and required clearances.
Match the grill and rotisserie to your cooking plans
Start with the birds you expect to cook, how often you plan to use the rotisserie, and the space available in your outdoor kitchen. A larger chicken needs room to turn without contacting the grill, while the spit and attachment must suit the specific grill. Compare model specifications rather than relying on appearance or broad product-category descriptions.
Review the equipment guidance for practical details such as:
- Whether the grill is compatible with the rotisserie attachment you plan to use.
- The capacity and clearance needed for the bird to rotate freely.
- How the spit, forks, and motor are meant to be fitted and operated.
- Whether the planned grill position allows the lid and other components to work as intended.
These checks help you match the equipment to the cooking you want to do, rather than choosing a grill by appearance alone. The built-in grill selection is a useful starting point for comparing options. Then review individual manufacturer specifications for rotisserie compatibility and operation.
Plan a complete outdoor cooking space
A built-in grill can anchor an outdoor cooking area, with counter and serving space arranged around the way you prepare meals. If rotisserie cooking is part of the plan, account for the equipment’s clearances and access as you consider the wider layout. A considered arrangement can make it easier to cook, monitor the bird, and serve without crowding the area.
Think about the whole setup: grill placement, room for the rotisserie to operate, space to prepare and serve food, and how the cooking area connects to the rest of the outdoor kitchen. If you plan to cook whole chickens on a rotisserie regularly, consider these details before settling on a grill configuration. Base compatibility and clearance decisions on manufacturer specifications, since requirements differ between setups.
For guidance on grill sizing, rotisserie compatibility, or outdoor-kitchen configuration, schedule a consultation.
Plan your next outdoor cooking setup with confidence
As you plan a lasting outdoor cooking space, consider rotisserie use alongside the layout, the meals you enjoy preparing, and the equipment’s verified compatibility. Knowing how to cook a whole chicken on a rotisserie can help clarify what matters in your setup, but the grill and attachment specifications should guide your final choice.
The Pinnacle Patio offers built-in grills from Bull, AOG, and Kokomo. Schedule a consultation to discuss sizing, compatibility, and configuration as you plan an outdoor kitchen around the way you cook.
With thoughtful planning and equipment that fits your cooking needs, rotisserie meals can become part of an outdoor space designed for preparing and sharing food.
Frequently Asked Questions
Can you cook a whole chicken on a pellet grill?
Yes, if the specific pellet grill supports a compatible rotisserie setup. Check the manufacturer’s instructions for attachment fit, clearances, and operation rather than assuming compatibility based on grill type. The essentials are the same: secure and balance the bird, use controlled heat, and verify doneness with a food thermometer instead of relying on cooking time alone.
Is it safe to leave a rotisserie chicken cooking unattended?
Stay attentive while the grill is operating, and follow both the grill and rotisserie manuals. The motor, heat source, and dripping fat warrant attention, particularly during setup and if flare-ups develop. Don’t leave a live grill without supervision or assume that rotation makes cooking risk-free. If a problem occurs, shut down the equipment safely according to its instructions before checking or adjusting anything.
Can you cook a whole chicken without a rotisserie attachment?
Yes. You can roast a chicken in an oven or use indirect heat on a grill, but it won’t rotate on a spit. Each appliance has its own cooking method, so use a tested recipe suited to your oven or grill and secure the bird as that method requires. Check doneness with a food thermometer and follow current food-safety guidance for poultry before serving.
How do you carve a rotisserie chicken without tearing the meat?
Let the chicken rest first, then set it on a stable cutting board. Hold it steady with a carving fork and use a sharp knife. Remove each leg and thigh by cutting through the joint, then separate the wings. Slice the breast meat across the grain where practical, using smooth, controlled strokes rather than pressing down. If the bird shifts, reposition it before continuing.
What should you do if the rotisserie motor stops while cooking?
Switch off the motor and grill safely before inspecting the setup. Follow the equipment manual, keep clear of hot spit components, and don’t force the motor to turn. The chicken may need to finish cooking by another suitable method. Use an appliance and approach that can cook it evenly, then check doneness with a thermometer and follow current poultry food-safety guidance before serving.
How should leftover rotisserie chicken be stored and reheated?
Refrigerate leftovers promptly in covered, shallow containers, following current USDA Food Safety and Inspection Service guidance. Removing meat from the carcass can help it cool and reheat more evenly. Reheat leftovers according to current USDA guidance, since recommended handling details can change. Keep the chicken covered during storage, and avoid leaving it at room temperature while you finish serving or clean up.